5.7: Differential basics

The differential (or diff, for short) allows the left and right wheels to rotate independently, which helps balance the car through corners. Its configuration determines how much of the torque coming off the engine is transferred to each wheel. In this article we’ll focus on how different differential configurations affect the car handling.

If you’re interested in the mechanical workings of a differential, we recommend you check out the following videos: ‘How a Differential Works?’, ‘Understanding Limited Slip Differential’, and ‘Working of Limited Slip Differential’.

Locked differential (also known as a spool)
The spool is essentially a solid axle connection between the left and right wheels, or a fixed differential. Some people weld their differential fixed, for instance to allow easier drifting. A spool ensures both left and right tires rotate at exactly the same speed.

A spool gives you good traction accelerating on a straight line, but the handling of the car is compromised during turning. When going around a corner, the outside tire has to travel a longer distance. So, the inside is forced to rotate faster than it needs for the turn radius and hence spins. This causes stress (wear) on both tires and the drive train. In terms of handling, this causes understeer when decelerating, and oversteer when accelerating.

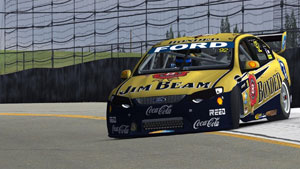
Spools are typically used in karts, drag racecars, some oval race cars and some road race cars. Notable road car examples on iRacing are the V8 Supercars.

Open differential
A completely open differential allows the left and right tires to rotate entirely independently. This helps with turning. The open diff also allows more torque to be transferred towards the less loaded tire. This is quite unfavorable when one tire is on a slippery surface like mud, grass, ice or wet track markings, as the tire on the slippery surface will end up spinning, consuming most of the available engine torque. Consequently, there may not be enough torque going to the tire on the grippy surface, so acceleration would suffer.
In terms of handling, an open diff gives you oversteer at the entry of a corner, and will understeer at the exit. Most open diff cars are underpowered, however, high-powered open diff cars (or cars with open limited slip differential), may spin the inside wheel on corner exit. Excessive spin on the drive axle cause that axle to lose grip causing sudden oversteer (on RWD cars) or understeer (on FWD cars).

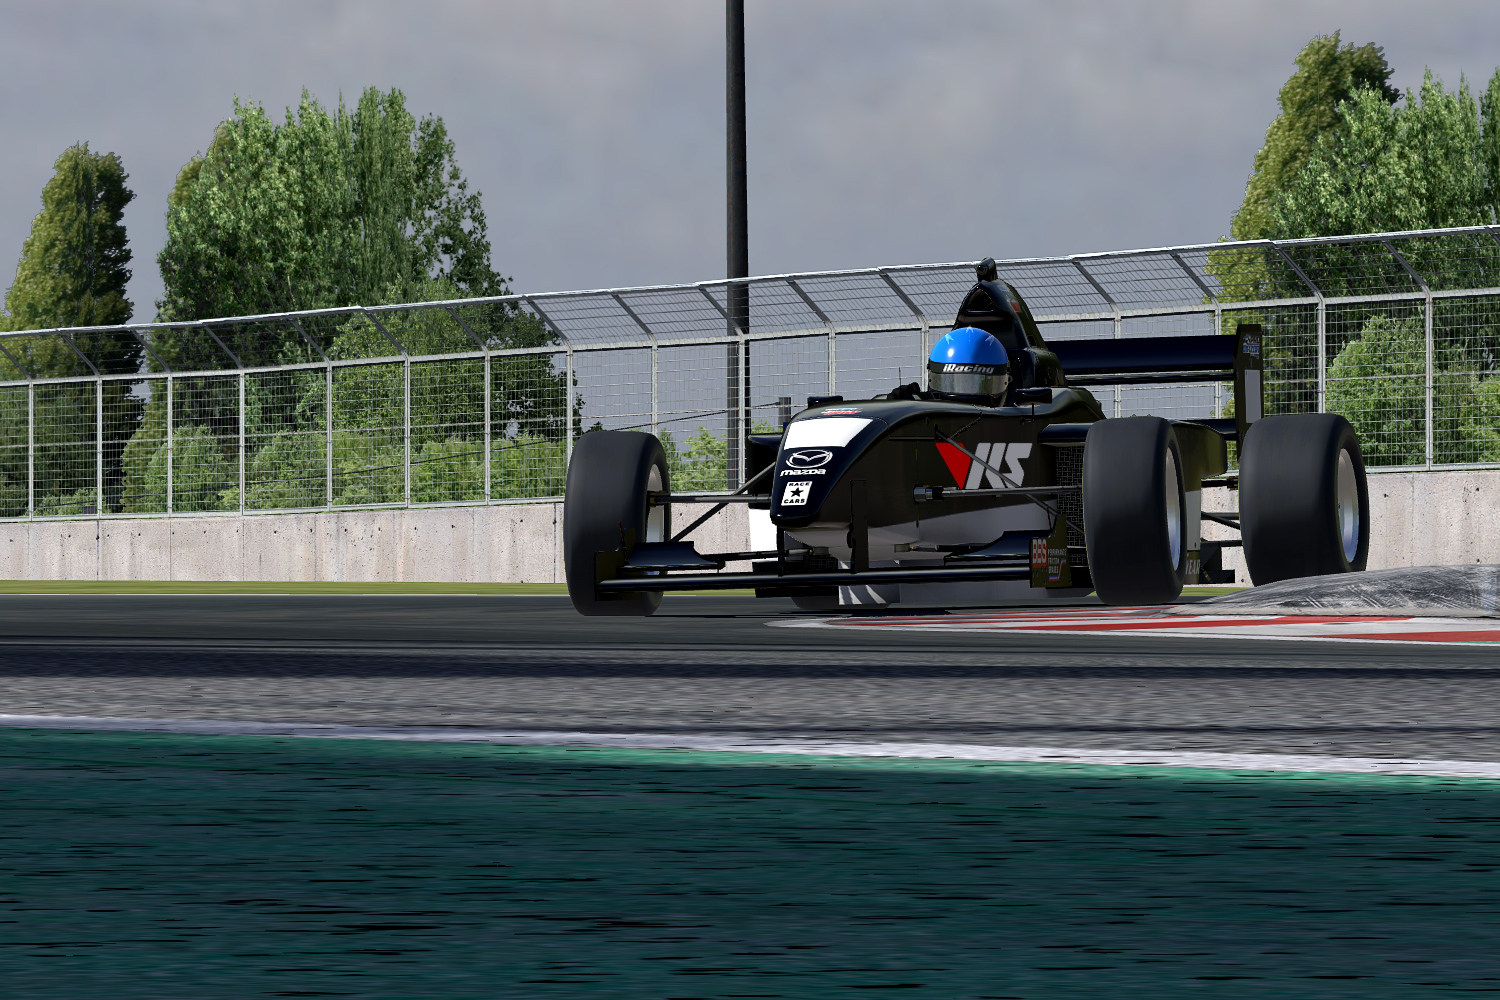
The open diff presents challenges in low traction conditions. In addition, the balance changes suddenly through the corner, which is not desirable for a race car, as you are giving up traction. On iRacing, the Pro Mazda, Skip Barber and Spec Racer Ford are open diff cars.

Locking differential
A locking differential can behave both as an open differential and as a spool. The locker mechanism unlocks the wheels during corner entry and mid-corner and locks them on corner exit, when on the power. A popular locking differential is the Detroit Locker, used in NASCAR.

Limited slip differential
As we saw, both a spool and an open diff have their issues, especially in racing conditions. Most race cars thus use a limited slip differential, which offers the best of both worlds. You can tune the differential to behave as an open differential in certain conditions. And you can tune it to apply a certain amount of “lock” between the left and right tires. By optimizing the diff setup, you can improve your car handling through a corner.

Adjusting a limited slip differential
A limited slip differential might have any (or none) of the following adjustments available, but here’s what they do:

  • Number and/or type of of friction & clutch plates: the more friction and clutch plates, the more locking happens through all corner phases.
  • Preload spring: defines the base amount of force that is applied on these friction and clutch plates. With small enough (or negative) preload, you can open up your differential. The heavier the preload spring, the easier your differential will lock.
  • The Ramp angle: this can be used to tune the amount of locking under deceleration/acceleration. For instance 50/80, where 50 stands for the locking during deceleration into corners, and 80 for acceleration out of corners.

Each car in iRacing has a different differential settings available, under different names and configuration values. For example, here are the differential settings for the McLaren MP-30:

Up to you

You can achieve identical handling with completely different diff builds/configurations. As always, it’s important to experiment with each setting to gain experience with the car and to develop an instinct for how to approach differential setup. However, here’s a starting point when you think about each diff setting:

  • You want to start with changing the number of plates to control how quickly the differential builds up locking force. The more locking force, the more it behaves like a locked diff and vice versa, the less locking force, the more it behaves like an open diff.
  • You may consider the preload as a form of general trigger for sensitivity. It set a minimum amount of locking force that is applied at all times.
  • You’d consider changing the ramp when you want to modify handling under braking (entry) without impacting the handling under acceleration (exit).

5.5: Ride Heights basics

Static ride height is one of the key setup adjustments, and also one of the easiest to get right. For example, for many cars converting a qualifying setup into a race setup (or vice versa) only means adjusting fuel and the static ride height. In this article we’ll explain what ride height entails, how you can adjust it, and how it affects other setup adjustment.

Static versus dynamic ride heights
Ride height (measured in mm or in) defines how far off the ground the chassis sits. Static ride height is what you configure in the garage. Dynamic ride height is the actual ground clearance at any moment in time as the car goes around the track. The dynamic ride height changes throughout a lap, for instance when a car goes over a curbstone, or when downforce compresses the springs. The dynamic ride heights also changes throughout a stint, for as the fuel burns off and the tank empties, the car becomes lighter and therefore ‘rises’.

Depending on the location of the ride height sensor (e.g. splitter, tire, etc) and its vertical offset, the ride height as measured in the garage (and as reported in telemetry) does not necessarily equate the actual ground clearance. For example, the splitter ride height sensor (on cars that have one) may be positioned a few centimeters above the bottom of the splitter. As a result, you’ll get a non-zero reading even if the splitter bottoms out. And obviously every single car is different, so the first thing you need to find out when you start setting up a new car is what “bottoming out” means in terms of ride height reading.

Purposes of changing the ride height
1: Lower center of gravity means less lateral weight transfer, which means more grip
For cars that are not very aero dependant the ride heights are primarily used to affect the center of gravity. A lower sitting car generally has better handling because a lower center of gravity means less lateral weight transfer. And we’ve discussed in 5.3, lateral weight transfer reduces the total available grip.

2: Balance between downforce and drag
For cars where aero is a defining factor in car setup, the ride height is the key to optimizing aero performance. Each car is different, but in general there’s an ideal ride height range that produces maximum downforce. Similarly, there is an ideal ride height range that minimizes aero drag. These two ranges may or may not overlap. Each car is different and it takes a bunch of experimentation with each new car to find out what works and what doesn’t. By statically and/or dynamically adjusting the ride heights, you can optimize the aero performance of the car.

3: Ground clearance
The final factor, relevant for both downforce and no-downforce cars, is clearance from the ground. You may want to adjust the ride heights to avoid bottoming out on bumps and curbs. Like discussed in the spring rates article, bottoming out can cause handling issues as one or multiple tires may become unloaded or lose contact with the track altogether, and it can also severely lower speed when the car is dragging onto the track.

Example
One of the most common setup scenarios is converting a qualifying setup to a race set. In most cases the additional weight due to the added fuel is bringing the car ‘out of tech’, which means it’s too close to the ground and isn’t legal to race. To pass tech inspection, you need to raise the ride height.

Typically, it’s best to keep a note of the target ride heights as they are in the qualifying setup and try to resemble those as close as possible on the race setup. In order to increase ground clearance, you’ll need to decrease the perch offset on each wheel, or increase the pushrod length (when available). Matching front and rear ride heights may be all you need to convert a qualifying setup to a race setup.

For cars where the gas tank is located far from the center of gravity of the car (e.g. the BMW Z4 GT3 has it’s tank fairly far back in the car), setting the race fuel ride heights could be trickier. As fuel is burnt throughout a stint the front or back of the car will get lighter, increasing the ride height. You may have to take this into consideration when determining the static ride heights with a full tank.

How suspension geometry affects ride height
Different simulators implement this differently, but in iRacing you cannot set the ride heights with one parameter. Instead, on each wheel you can adjust the spring perch offset, or increase the pushrod length (when available). Adjust these properties until your achieve the desired measurement for ride height.

Keep in mind that many suspension elements are connected. Significant changes to spring perch offset, or to pushrod length could also impact camber and toe. Each time you make a change to ride heights you should remember to also take a look at camber and toe. If your camber has changed, change it back to the old (desired) value. This may change your ride height again, so you may have to do a few iterations of ride height adjustment, camber adjustment, until you achieve the desired result. The same applies to each wheel’s toe-in.

When adjusting ride heights
You need to keep ride heights in mind each time you change any of the following:
Spring rates: Stiffer springs raise the car, softer springs bring it closer to the ground. When changing spring rates you want to make sure that you maintain the ride height from before the spring rate adjustment (otherwise you’ll be applying two changes to the car).
Tire pressure: The tire is effectively a spring, and significant changes in tire pressure affect ride heights too.
Camber & toe: As already discussed, camber and toe adjustments may affect the ride height. Modify the suspension geometry so that you achieve the new desired camber (or toe) at that same ride height.
Fuel load: Added fuel (per the example above, for full race distance as opposed to for qualifying) adds more weight to the car, which compresses the springs more, which reduces the ride heights. Each time you add and remove fuel you’d generally want to do so without actually modifying the static ride height (with some exceptions, depending on car or track).

Up to you

Once you understand what ride heights are and what interactions ride heights have with suspension geometry, you need to spend a lot of time testing and experimenting with different settings in order to find out what works with each specific car. And in a later article we’ll look more closely how to approach dynamic ride heights.

5.4: Spring rates basics (Formula Renault 2.0)

Untitled-6(If you haven’t read article 5.3 about anti-roll bars, please do that first, because this article builds on the same basics of physics.)

From the Skip Barber, we progress into a faster and more complex car: the Formula Renault 2.0. The FR 2.0 has more setup options available, including an important one, which will vary greatly between circuits: the selection of front and rear springs. The spring rates hugely affect mechanical grip, but also aerodynamics, which may surprise you.

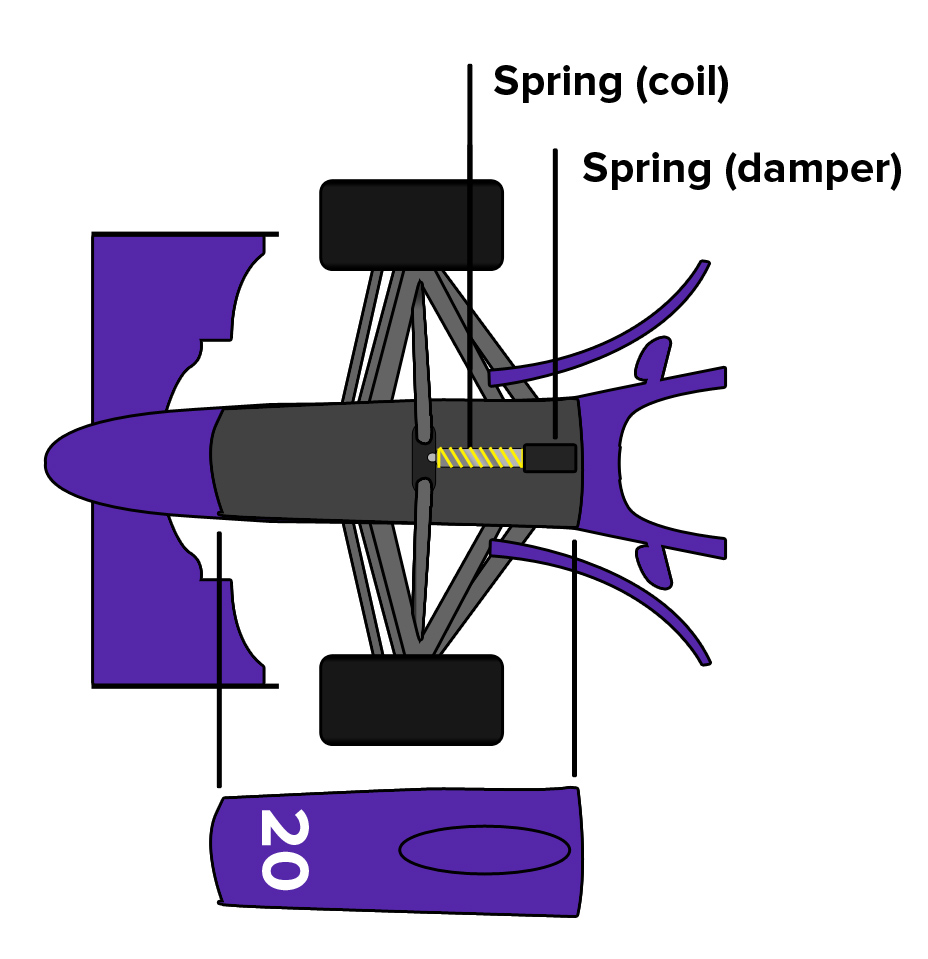
The most common type of spring used in race cars is the coil spring, which is typically installed together with a damper (see picture). For this article though, we’ll focus solely on the coil spring, and ignore the damper until a later article.

Spring rates and their effects
The spring rate is the measure of spring stiffness, and represents the amount of force required to compress the spring a certain distance. It’s measured in Newtons per millimeter (N/mm) or pounds per inch (lbf/in).

  • A higher spring rate gives a stiffer spring, so there’s less displacement per unit of force (the spring compresses less easily).
  • A lower spring rate gives a softer spring, which allows more displacement per unit of force (the spring compresses more easily).

A spring rate adjustment affects the following:

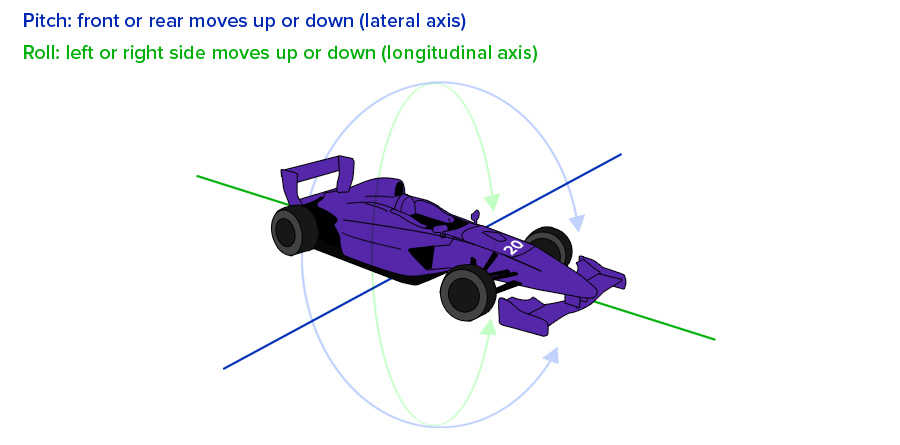
  • Weight transfer causes the ride height to change. For instance, during braking a car with softer front springs compresses more on the front, which pitches the car forward (dynamic reduction of ride height at the front). This impacts the mechanical grip of the car, because it changes the center of gravity. Aside from mechanical grip, an increased pitch (also known as rake) may also have aerodynamic effects, because the angle of the car changes. And during cornering, lateral forces cause the body to ‘roll’ which compresses the springs on the outside tires. Stiffer springs will reduce body roll. See the illustration for the difference between pitch and roll.
  • Aerodynamics will cause the ride height to change. For example, softer springs will compress more on the straights, as higher speeds generate more downforce. Lower dynamic ride heights are advantageous in reducing aero drag (unless the floor is scraping the track!).
  • The ‘bounciness’ of the car. For example, with stiffer springs, going over bumps and curbs may cause one or more tires to get momentarily unloaded or completely lose contact with the track, which would cause handling issues. Going with softer springs could solve the ‘bounciness’, but in return could hurt the pitch and roll attitude of the car, and may influence suspension geometry (such as camber), and consequently hurt aerodynamic effects and possibly cause aero-related handling issues.

3v2small

As we see, springs don’t control a single variable in a straightforward way. So, finding the optimal spring rate is a matter of finding the right trade-off between the above effects, which is often a compromise. In practice, when setting up the car, adjusting spring rates comes in handy when optimising aero effects, and the tradeoff is typically between aero related time gains (lower drag on the straights) and car handling (more downforce in the corners).

The nature of the track would typically determine the baseline you start tuning from. With this we mean the bumpiness of the surface, and the lengths of the straights, and whether there are many fast or slow corners.
On tracks with fast straights and many flat, slow corners (such as Gilles Villeneuve, Montreal), you’d like to start with stiff front springs and soft rear springs. Such a setup would produce more rake (and downforce) in the slow corners and less drag on straights.
On tracks with short straights and a wide range of corner speeds (such as Motegi), you’d like to start with stiff springs on both the front and the rear. This would allow you have a car with more consistent aero performance in all corners regardless of speed.

Most tracks are in-between, so you’d want to pick a baseline for the overall profile, then look at the track specifics. For example, a bumpy slow track like Sebring could need softer springs.

Applying it to the FR2.0
Let’s get to know the suspension layout for the FR2.0. As you can already see in the setup-screen, there is only one center mounted spring and damper in the front, with non adjustable ARB. In the rear are two separate spring and damper units. Unlike the front ARB, the bar in the rear is adjustable in stiffness.

fr2.0-illuUntitled-1

This single spring design at the front is called a monoshock. It is characteristic of a monoshock that the front spring has no effect on roll-stiffness. It only provides stiffness in heave (vertical) motion. This essentially causes spring stiffness to have no significant effect on the mechanical balance (lateral load transfer distribution and roll) of the car. And so the front roll-stiffness is solely controlled by the front ARB, which is adjustable in the real car, but is fixed in iRacing.

In contrast, with the two springs at the rear of the car, roll stiffness is influenced by both the adjustable rear ARB and the rear springs. In practice, you wouldn’t make spring rate adjustments to affect roll-stiffness. If a spring rate adjustment (for a different reason) results in undesired impact on roll-stiffness, you’d counter that effect with an ARB adjustment.

The regulations allow the FR2.0’s ride height to be very low, as a consequence you can run the stiffest front springs and still achieve your desired front ride height. This simplifies the front spring rates setup. In general, aim to run the stiffest springs that still allow you to go over bumps (if a curb is giving problems, you may not want to counter it through setups, but just avoid hitting it). Finding out the optimal rear spring rates will mostly be a matter of how much you want to vary the dynamic ride height in the back. Stiffer rear springs give you a more consistent handling through the corners, while softer rear springs will give less drag on the straights.

Over to you

Try fiddling with the spring rates, and see if you can improve your laptime with it. For instance, load a session at Silverstone Historic. The circuit has fast corners and fast straights, so a compromise is needed between the two baselines suggested above. You pick either baseline as a starting point, for example stiff front and soft rear. From there stiffen the rear and see if it leads to laptime improvements. Because the rear spring rate changes multiple parameters of the car, such as the ride height, you could correct those accordingly to maintain the same static ride height. You can also use the anti-roll bar to help restore the balance of the car, just never change it together with the spring rates, because it makes it hard to tell which change is causing which effect.

5.3: Anti-roll bar basics (Skip Barber F2000)

Untitled-1After the tyre pressures, which we handled in 5.2, another significant setting to tweak on the Skip Barber is the anti-roll bar (ARB) in the rear. First of all, you need to understand what an ARB is and what it does to the car.

The red component in the illustration below is an anti-roll bar, which nearly every racing car has on its rear and/or front axles. The ARB connects the suspension elements of two wheels on the same axle. As a result, as soon as one wheel moves up or down, the other wheel is forced to follow that motion. However, the ARB is essentially a torsion spring which stores some of the energy when twisted, so not the entire movement of one tire is transferred to the other.
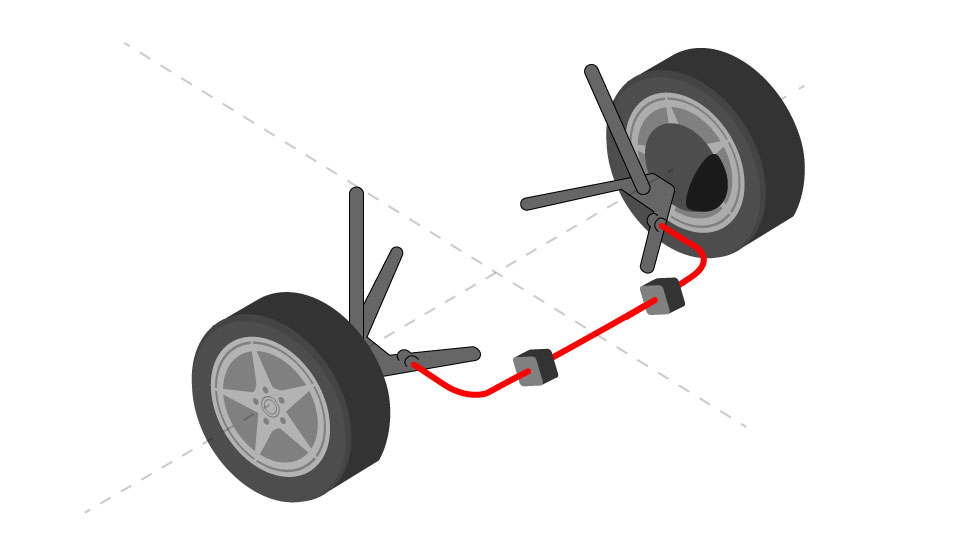
arb3

To give an example of an ARB’s importance: When a car without an ARB installed goes through a fast right-hand corner, the inertia forces the car to lean to the left side, which is on the outside of the corner. This is because the mass of the chassis is not willing to change direction, while the tyres that grip to the surface are. Relative to the chassis, the left tyres move upwards, the right tyres move downwards, causing body roll. Try to visualise this in your mind.

  1. The main purpose of the ARB is to change the roll stiffness of the axle it’s installed on, which has two important implications:
    The more horizontal a car goes through a corner, the better the chassis is at creating downforce. We’ll cover this in a later article, since here we’re covering the low downforce Skip Barber car.
  2. The ratio of roll stiffness between the front and rear axles affect the balance of the car, especially its tendency to under- or oversteer. Unlike downforce, this is highly relevant for the Skippy.

To understand how balance is affected, we need to understand that as vertical load on a tyre is increased, the coefficient of friction of that tyre decreases. You still get more grip, but proportionally less. This is known as load sensitivity.

graph

Let’s work through an example, using the chart above. At 400 kg of vertical load on a tyre, the coefficient of friction is 1.25. By multiplying the two numbers, you get the amount of friction force provided by the tyre:

400 x 1.25 = 500 kg (single tyre)

If we have a perfectly balanced axle where each wheel is loaded with 400 kg, the total available grip at that axle is:

(400 x  1.25) + (400 x 1.25) = 1000 kg (axle)

Cornering causes lateral (left/right) load transfer at each axle. Vertical load will increase on the outside tires and will decrease on the inside tires. Continuing our example, let’s assume that due to lateral load transfer the vertical load on the left tyre becomes 500 kg, while the load on the right side becomes 300 kg. The coefficient on the left tyre decreases from 1.25 to 1.11, while on the right tyre it increases from 1.25 to 1.35.

500 kg x 1.11 =550 kg (left tyre)
300 kg x 1.35 = 405 kg (right tyre)
550 kg + 405 kg = 955 kg (axle)

So while the total load on the axle remains the same (800kg), the total available grip is now only 955 kg. Just when you need grip the most!

Now we understand how an axle can lose grip under cornering, and is this precisely what causes handling issues. When the available grip of the rear tyres is exceeded first, the car goes into oversteer; when the grip of the front tyres is exceeded first, the car goes into understeer. An ARB can balance this out.

Using the ARB to balance the car
A softer ARB causes less lateral load transfer on its axle, compared to a stiffer ARB. This can improve the balance of the car, and increase overall grip on the axle as shown in the earlier example. The ARB stiffness can also determine the lateral load transfer between the front and rear axles, even if a car only has one ARB, like the Skippy, which only has one on the rear.

A stiffer rear ARB causes more of the lateral load transfer to be distributed to the rear axle. Softer rear ARB means more of the lateral load transfer is distributed to the front axle. A stiffer rear ARB thus reduce available grip at the back while increasing it at the front, hence, making the car more oversteery and less understeery. Conversely, softening the rear ARB increases available grip at the back while decreasing it at the front, hence, making the car less oversteery and more understeery.

Controlling how much lateral load is transferred on the front versus rear axle is a balancing act, to optimise how much grip is available at each axle. Tuning the rear ARB on the Skip Barber car is mostly a question of driver preference: If you find the car too unstable for your liking, you can try reducing rear ARB stiffness. If you find the car unwilling to turn, you can try stiffening the rear ARB.

It’s important to note that tuning the ARB will only make a difference if you are utilizing the traction circle, as explained in 3.1. If you ask too much of the car (overall G’s), the ARB won’t help. If you ask too little, you won’t notice any difference in handling.

Up to you

Get the Skip Barber out for a spin, and see if you can adjust the ARB to your liking! See if you feel the effect of it, and try to visualise the forces working on the car as you go through the corners.

For further explanations on the matter of ARBs, please see the more advanced chapters of this guide, which we’ll publish soon.
5.2: Tyre pressures basics (Skip Barber F2000)

tyresOne of the few setup options available to the Skip Barber car is the pressure in the tyres. It’s also one of the most important things to get right on every single car. To find the ideal tyre pressure, it’s important to know what to look out for.
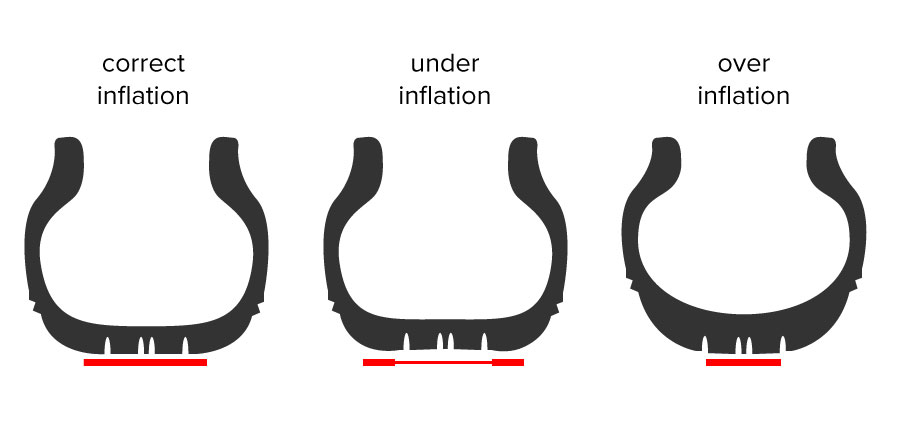
Tyre pressures influence a number of factors in the performance of the car, and both high and low tyre pressures have their drawbacks.

Factors: Deflection, contact patch, vertical and lateral stiffness
A tyre is a spring and damper unit after all, and becomes stiffer with higher tyre pressures. A higher tyre pressure also changes the curvature of the tyre, from a flat shape to like that of a bicycle.

Lower tyre pressures lower the vertical stiffness, which in turn causes a bigger contact patch (flatter tyre), and in theory sounds promising. Yet a bigger contact patch also increases the rolling resistance of the car. An even lower tyre pressure will cause the shoulders of the tyre to bare the grunt of the load, less than ideal (see illustration).

untitled-3

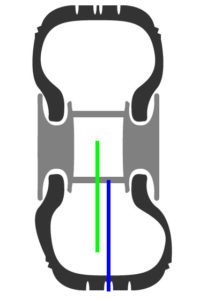
type2Moreover, lower tyre pressures also affect the lateral stiffness, and when running very low pressures, it’s possible that the middle of the tyre is no longer at the centre of the rim while cornering. It can cause the sidewalls of the tyres to nearly fold. This is also not ideal (see image).
This effect is most noticeable on the McLaren MP4-30 or Williams FW31, as they’re running on wheels with very tall sidewalls relative to their width. We recommend you take either of these for a spin on low tyre pressures, so you get familiar to the feeling of too-low tyre pressures.

Finding the balance
So, running low pressures has it’s drawbacks, as does having too high a pressure. As with almost every setup option that will be covered later on, some compromise is needed.

Fortunately, for the Skip Barber car and its tyres, finding the ideal pressure is fairly easy and does not depend on the track or weather conditions too much. We suggest you select a track, default weather and start a test session. Use the baseline setup, and drive a few laps to get the heat into the tyres. When the pressures stabilize, you have reached the stable operating temperature of the tyres. You have to use telemetry to find out after how many laps this takes. Let’s say that number is 4 laps. You’d need to drive 4 + 5 laps (4 laps to get the tires warmed up, then 5 clean laps within a few tenths of each other). Observe the car and check your laptimes.

Then increase the pressure a bit, and check behaviour and laptimes again. If the car is nicer to drive and/or quicker, go into the same direction with the pressure another time. If it’s worse and/or slower, go back to the original setting and then lower the pressure. Repeat this step until the improvement stops or the car becomes worse again.

The Skip Barber, as a non-downforce car, can be driven with the same pressure at practically every track. However, with higher end cars, especially those with high amounts of downforce, finding the right tyre pressure becomes a little more complex. A given tyre pressure is ideal for one specific amount of load on the tyres, yet this load varies greatly because of the different amount of downforce generated through high and low speed corners.

As a general rule of thumb, on tracks with lots of low speed corners such as Okayama, you’ll want to run relatively low pressures, because compared to high speed circuits like Spa, the downforce generated by the car is fairly low on Okayama, and therefore the loads on the tyres are lower. At a track with lots of high speed corners you may want to run higher pressures to increase grip in high-load situations.

When playing with the pressures you should be able to notice differences in traction in slow corners between higher and lower pressures. Likewise, you should notice a difference in grip in higher speed corners, although this might be more difficult to notice. Use the delta-bar to keep track of time gained or lost in individual corners.

Up to you:

The process of finding a good tyre pressure, at least for short runs, is the same iterative process as with the lower end cars. As you can already guess, for long runs it’s a little different and this will be covered later on in a more advanced section. Later on, we’ll also focus on temperature and weather differences.

For now, start your setup crafting career by finding the right tyre pressure. Continue with anti-roll bars, in 5.3.

5.1: To setup or not to setup?

vrsAs you progress through your iRacing career, competition is fiercer and you’ll need to use all the tools in the box to find the edge over your rivals. One of these tools is car setup. And while most beginner series have friendly communities with lots of setups being shared on the forums, the willingness to share setups significantly drops off at more competitive series. Especially at the top level of sim racing, setups are seen as highly guarded intellectual property. Thus, having a basic understanding of car setups becomes a very useful asset in your sim racing career.
But before you start, here are few questions you should answer to ascertain whether diving into setups is the best use of your time:

  • Are you willing to study and learn how to create a setup from scratch?
    This is not an “if this, then that” kind of guide. Setting up a car is about trade-offs within the limits of physics. Gaining proficiency in car setup is a process that requires you to experiment and analyze a lot.
  • Are you able to consistently hit lap times within 0.2s of your fastest lap?
    If not, then your biggest gains might not come from setups. In road racing, if you’re 3 seconds off the pace on a road track, probably only 0.3s is down to the setup. In oval racing, it’s much easier to learn the tracks, so car setup is a quite significant factor in open setup series.
  • Can you tell whether time loss was due to car or driver?
    You should be able to distinguish driver errors causing understeer, from a car setup change causing understeer. This means you should already be a driver capable of in-the-moment driving analysis.
  • Have you fully developed your driving style?
    Especially in road racing, driving style is typically a much more significant factor in lap times than car setup. Unless you are within 0.2-0.5s of your fastest teammate, or a VRS datapack, you are probably better off working on your driving style. On the flip side, if you have deeply ingrained old bad driving habits, it may be more efficient for you to tune the setup to your driving style. But still, we’d recommend that you try fixing your driving style first.
  • Are you used to driving the car which you want to setup?
    If you hop in a new car, it usually takes a bit of time getting used to it first. Pick up a decent setup (from the forums or a VRS datapack) first and focus on driving style until you are able to turn competitive lap times in the chosen setup.  

If you can answer all these questions with a definitive yes, then this guide is for you.

We’ll get started with the basics that apply to any car and we’ll progress to more advanced setup topics, which are only applicable to high-end cars. We’ll start with the Skip Barber RT2000, as it is the first open-setup car for most road racers, and also a car that’s understandable and sensitive enough to observe setup differences with. Then we’ll move on to the Formula Renault 2.0 which offers a lot more setup options. Also, the trade-offs between different adjustments become quite interesting in the FR2.0. Finally, we’ll look at a high-end, high-downforce car in the HPD ARX-01c.

Ready to get started? Head on to 5.2 where we focus on tyres.

1.5: Software

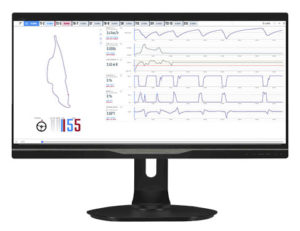
telUntitled-2There are a number of third party software tools that integrate with iRacing to improve your simracing experience or to aid you in your driving practice or racing. If you are part of a team, there are some nifty tools for team communication and sharing files such as setup or replays. And if you want to record your races and/or stream them on e.g. YouTube, there is software to help you with that as well. Let’s dive in.
Continue reading